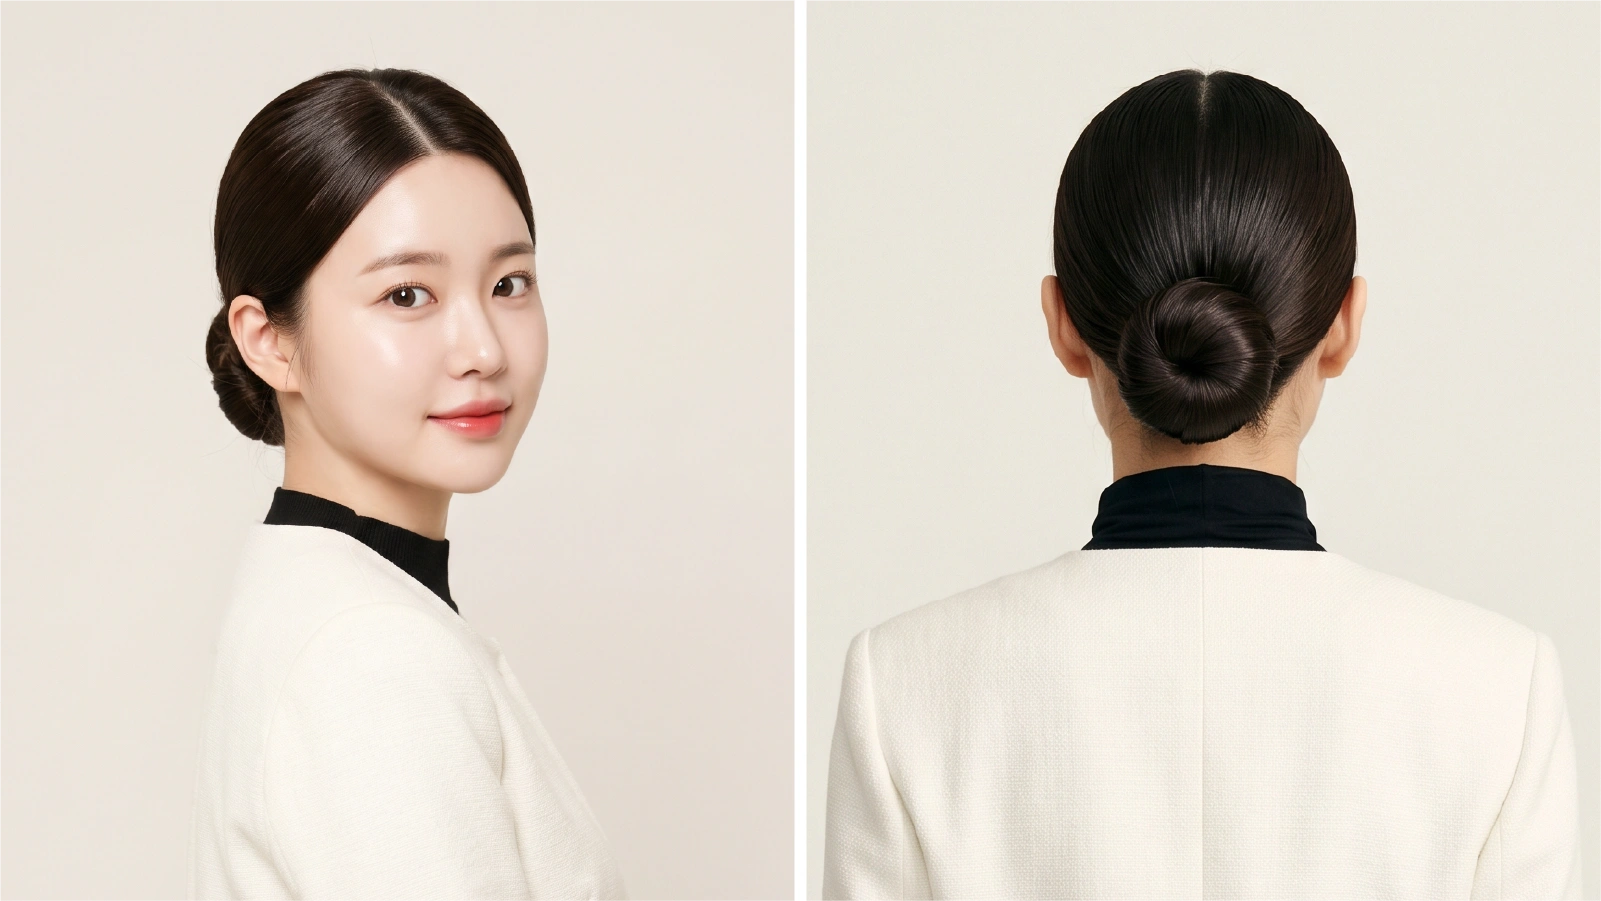
The slicked back bun is one of the most versatile hairstyles you can own — polished enough for a job interview, simple enough for a Sunday errand run, and genuinely more flattering than it has any right to be.
It pulls the face taut, elongates the neck, and signals effortless confidence with about five minutes of actual effort. If you’re searching for a look that anchors your rotation of easy hairstyles for women, this is the one.
What actually matters here isn’t the technique — it’s where to position the bun for your face shape, which finish matches your occasion, and how to wear it without damaging your hairline.
Style Snapshot
- Bun placement matters more than technique: a low bun suits square and round faces, while a high bun flatters oval and heart-shaped faces.
- Daily tight slicked buns are linked to traction alopecia by dermatologists — limit to 2–3 times per week maximum.
- Start with dry (or barely damp) hair: wet strands stretch and weaken under tension, increasing breakage risk significantly.
- The toothbrush trick is real — a clean spoolie or old toothbrush controls flyaways and edges more precisely than any brush.
What Makes a Slicked Back Bun Actually Work?
The slicked back bun gained mainstream recognition in the 1990s, particularly as a polished go-to among Black and brown women long before it became a TikTok trend.”
That cultural context matters: the foundational techniques — edge control, section work, strong hold gel — were refined by Black hairstylists and their clients years before any “clean girl aesthetic” hashtag existed.
What makes this hairstyle stick in 2026 is its adaptability. The same bun worn with a vinyl-glossy finish becomes editorial. Worn slightly looser with a matte mousse? It reads downtown cool. The technical base is identical — the finish is what changes the whole mood.
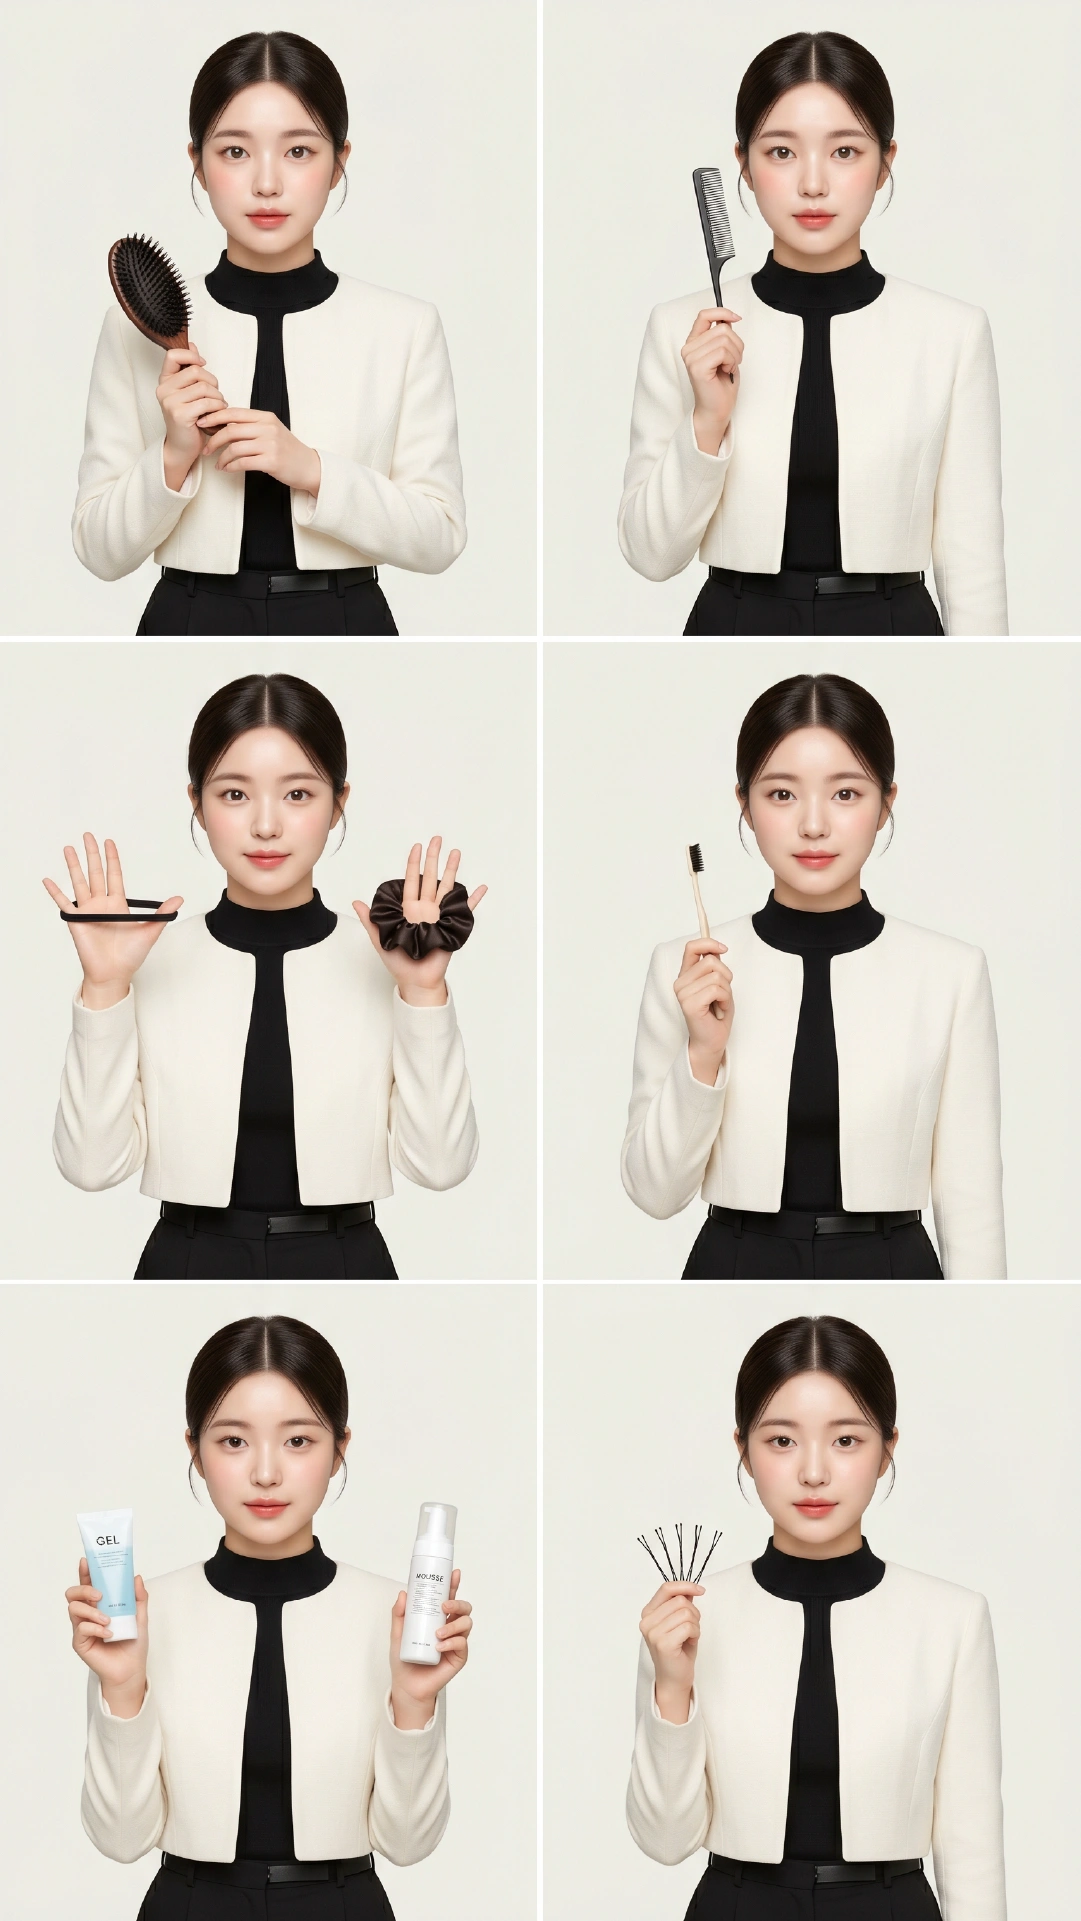
Essential tools you actually need:
- Boar bristle brush — catches fine hairs without static, creates that scalp-smooth finish
- Rat tail comb — for clean center or side parts
- Bungee hair tie (with hooks) or silk scrunchie — prevents the lumpy ponytail problem
- Toothbrush or spoolie — the non-negotiable edge tool every celeb stylist uses
- Strong-hold gel OR lightweight mousse — depends on your target finish (see table below)
- Bobby pins — at least 6, matte-finish to match your hair color
The slicked back bun’s secret weapon isn’t the gel — it’s the two-step section method that keeps your hairline intact while still delivering that snatched look.
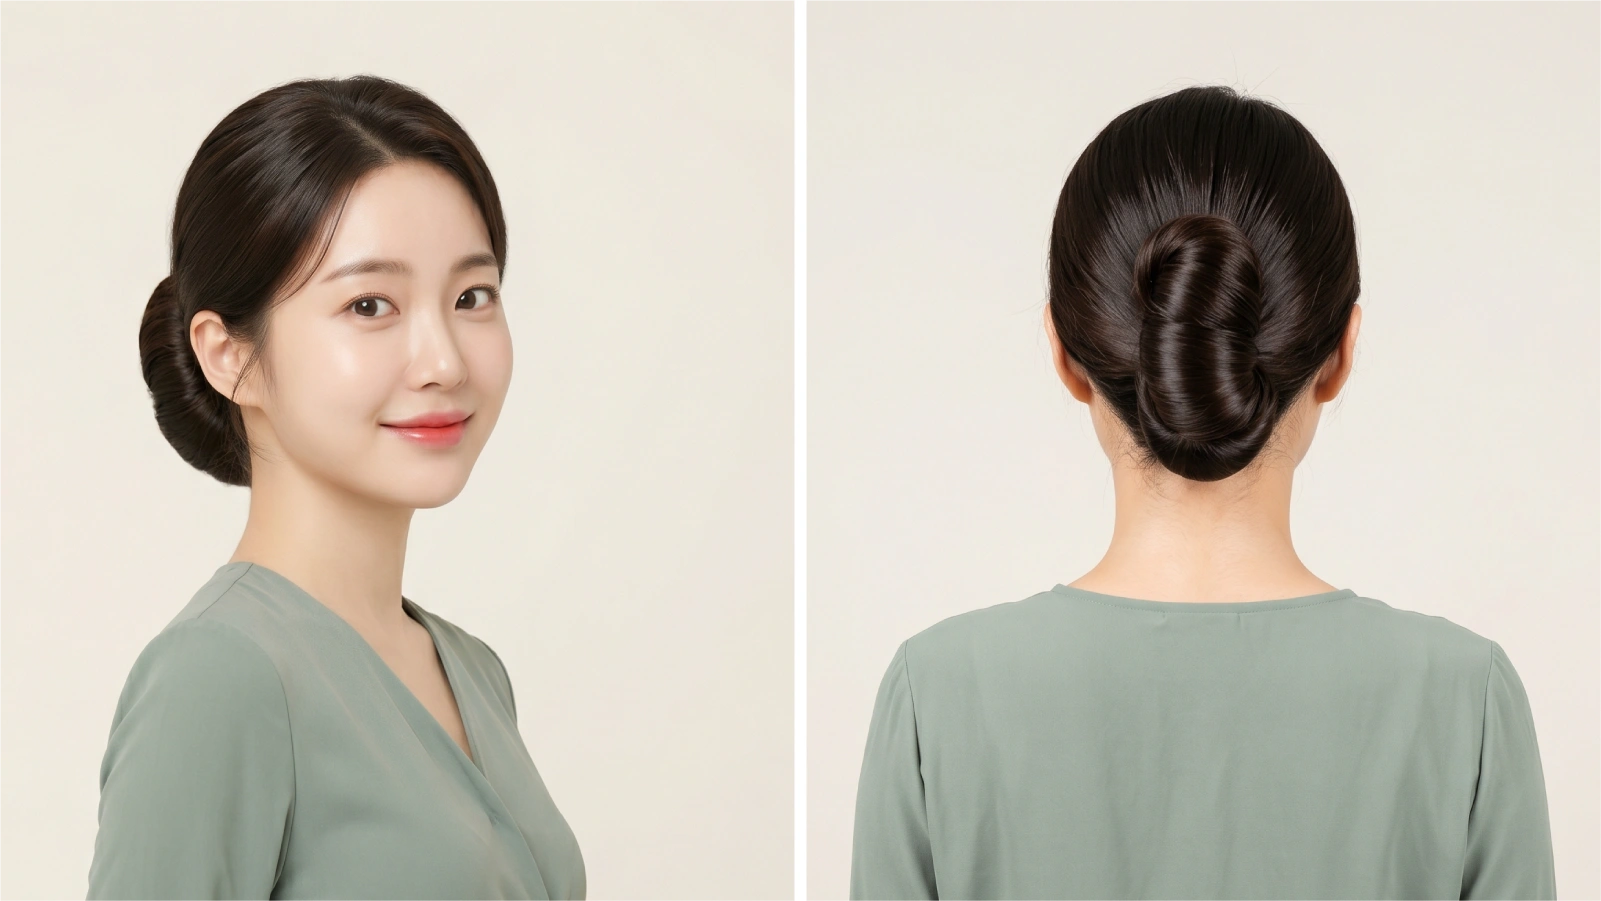
How Do You Choose the Right Bun Position for Your Face Shape?
Bun placement is arguably the most important decision you make before even reaching for the brush — and it changes everything about how flattering the result looks.
Face Shape to Bun Placement Guide
Bella Hadid — who has an oval face — is synonymous with the high, tight version for a reason. Olivia Wilde’s square features are consistently complemented by the sleek low bun. Face shape isn’t a rule; it’s a shortcut.
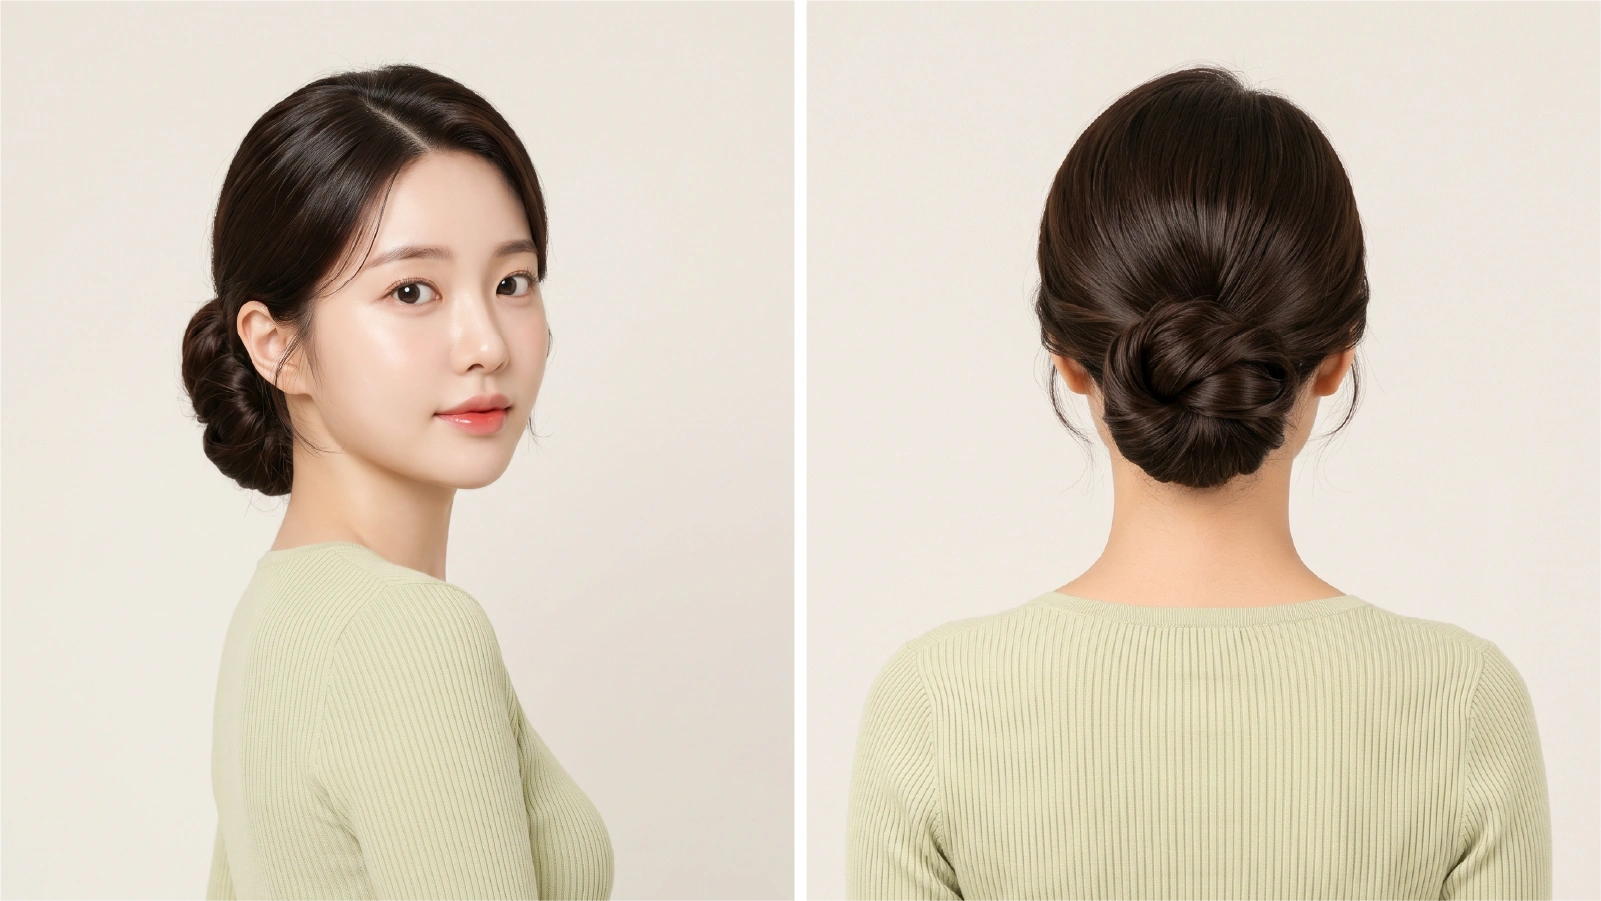
What’s the Step-by-Step Tutorial for a Perfect Slicked Back Bun?
The goal is a smooth, bump-free finish that lasts all day. Celebrity stylist Graham Nation widely recommend a two-step approach: secure the body of the hair first, then separately smooth the hairline. That single technique protects your edges from chronic tension while still achieving the snatched effect.
Follow this sequence:
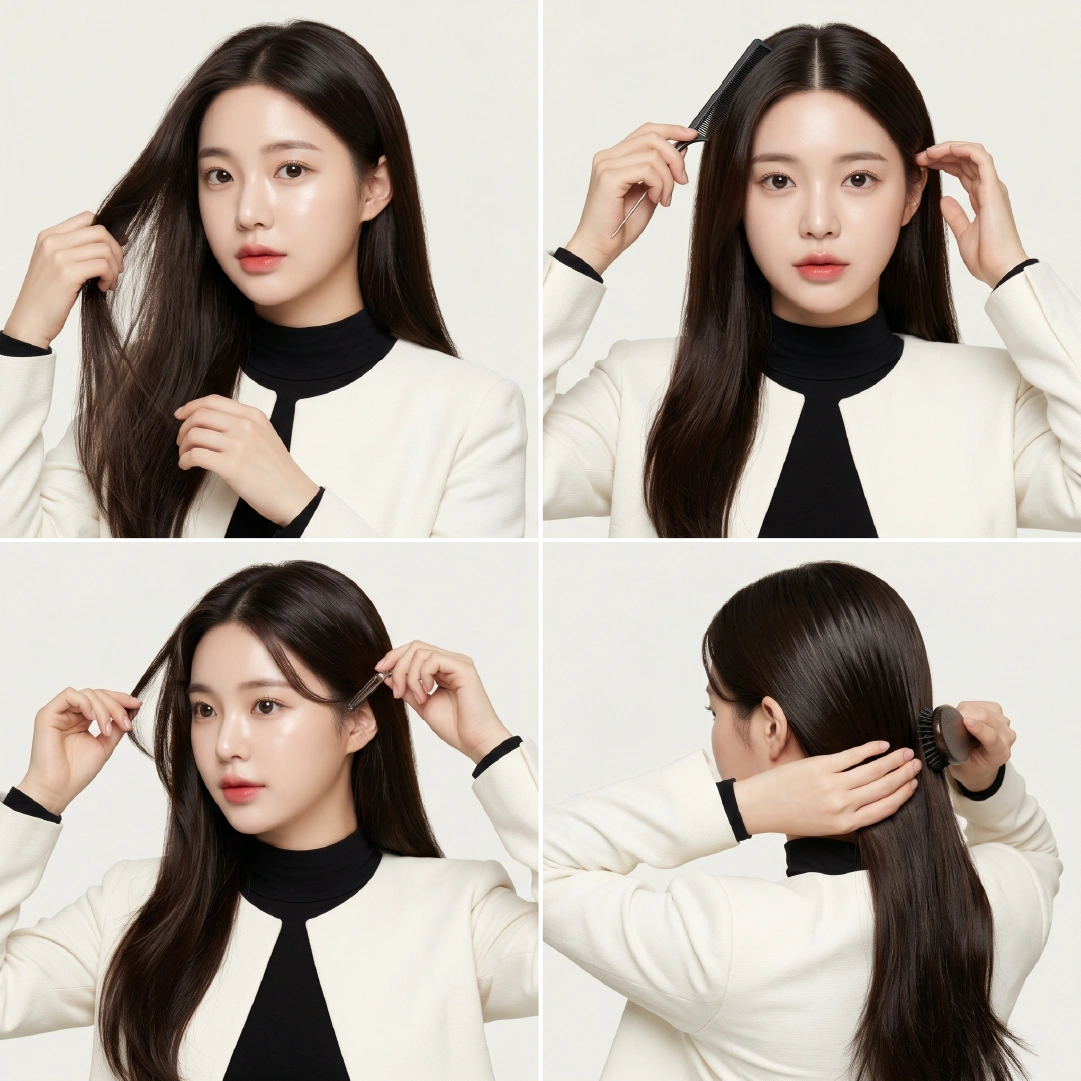
- Start with dry hair — or barely damp, never soaking wet. Wet hair is significantly weaker and more prone to traction damage under tension.
- Part your hair — center parting for classic symmetry, side part for a modern asymmetric moment.
- Section your hairline — pull approximately one inch of hair around the face’s perimeter out of the main ponytail, and clip it temporarily aside.
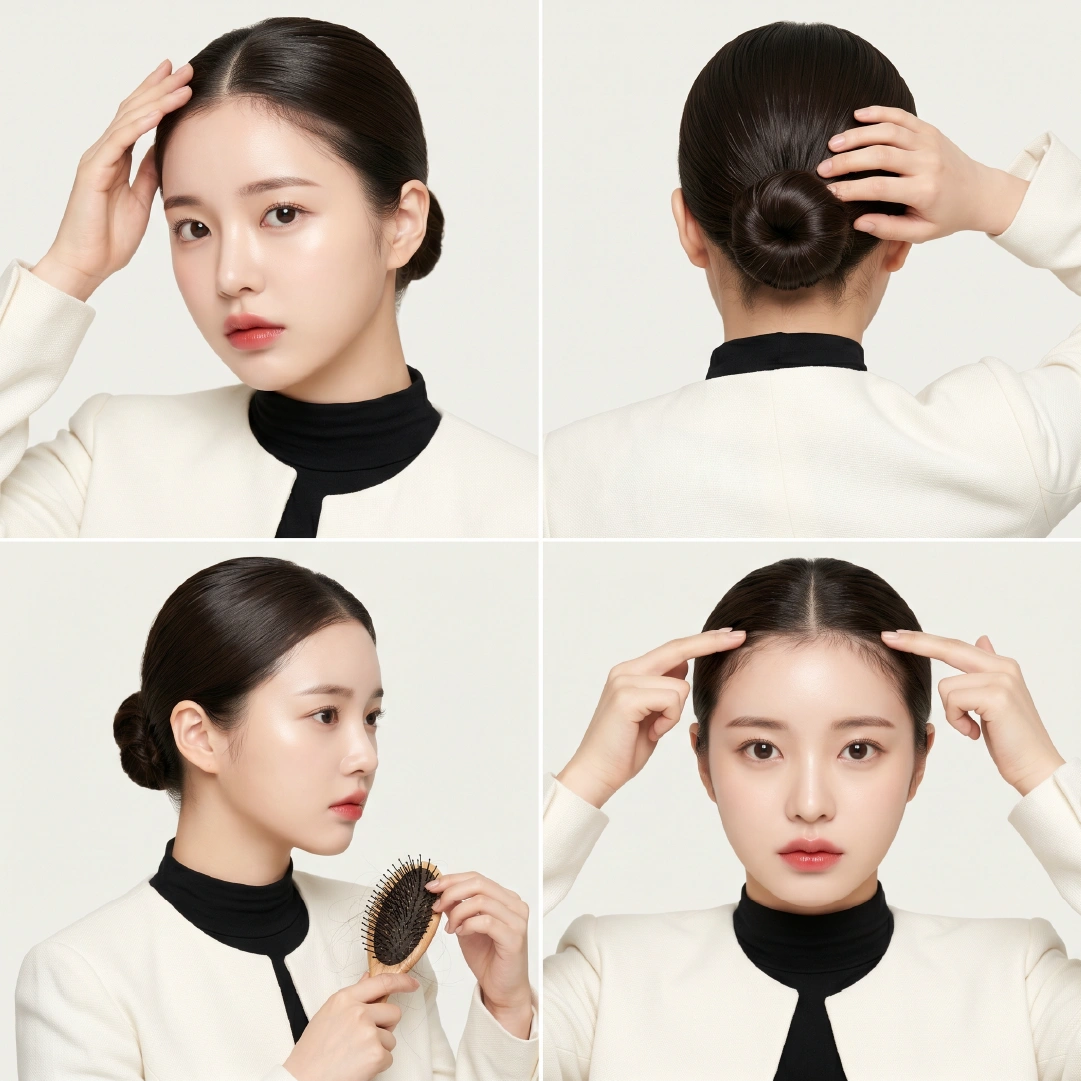
- Apply your product to the main section and brush back firmly with a boar bristle brush, gathering hair toward your chosen bun position.
- Secure with a bungee tie or silk scrunchie — silk reduces friction and snapping at the hair shaft.
- Wrap the ponytail around its base, tucking ends underneath, and pin with bobby pins in a circular pattern.
- Return to the hairline section — apply a small amount of edge gel or mousse with a spoolie or toothbrush, smooth flat, and press against the bun with a spritz of flexible-hold hairspray.
- Finish — a light mist of shine spray if going glossy, or a matte setting spray if you want the sculpted-but-natural look.

For curly and coily hair (types 3–4), spritz sections with water first, apply a curl gel like Pattern by Tracee Ellis Ross, and use a natural bristle brush to smooth without disrupting the curl structure at the edges.
Which Finish Should You Use — and When?
The finish completely changes the occasion-appropriateness of the style.
Finish Type Comparison Table
The finish is the entire point — the same five-minute bun reads as red carpet or grocery run depending on whether you reach for gel or mousse.
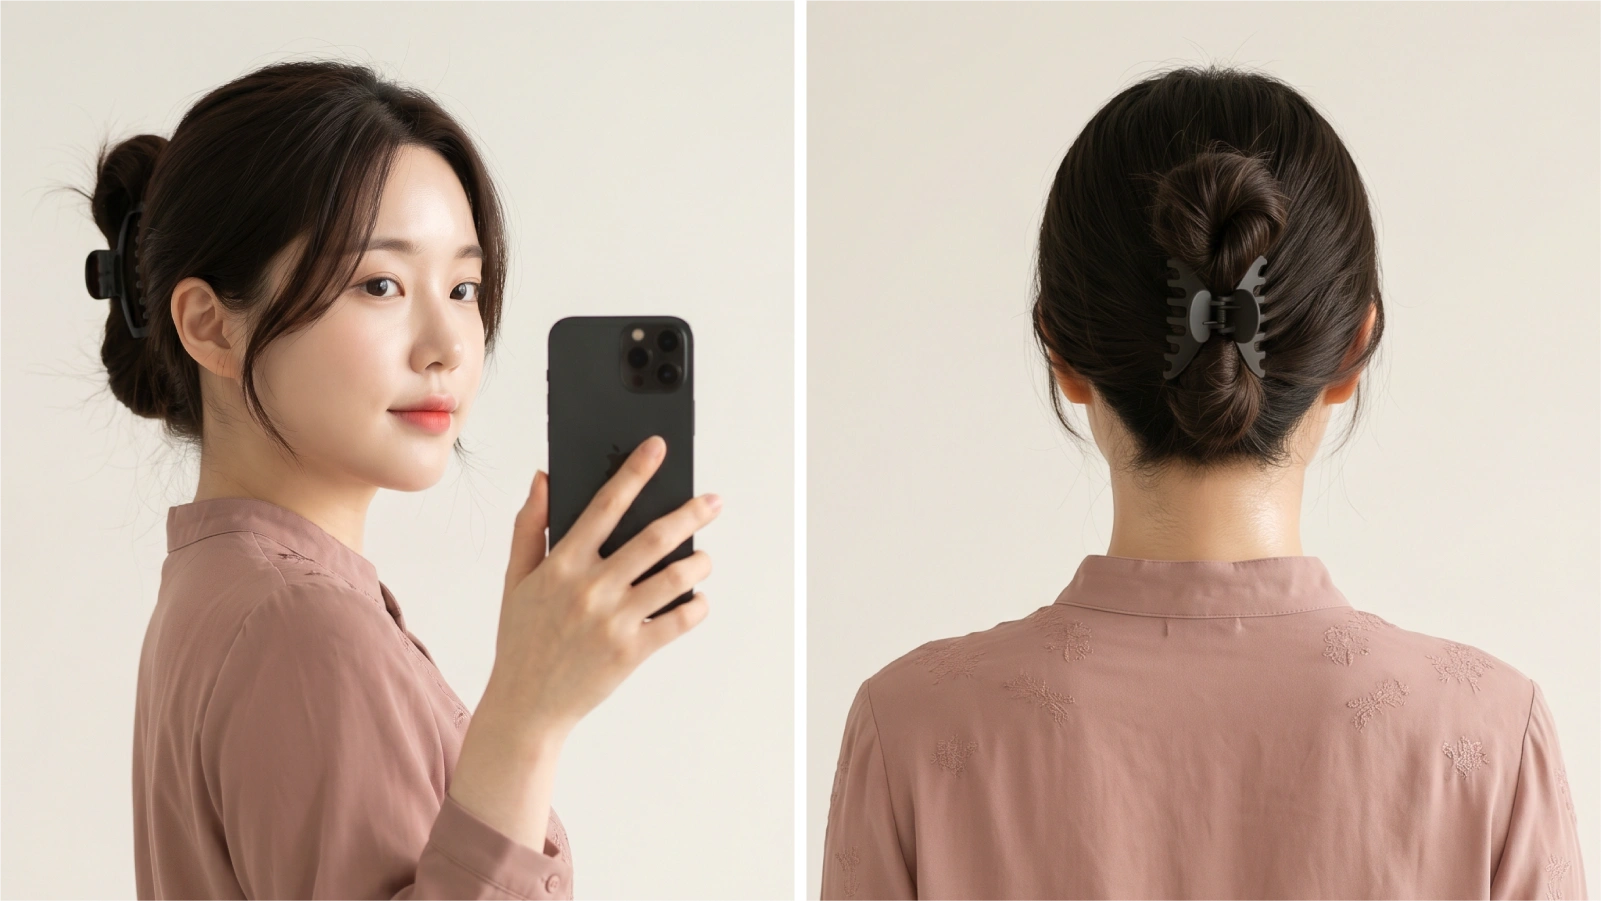
You can also explore the low bun for a softer version of this same polished look, or a twisted bun if you want added texture without losing the sleek base.
Can a Slicked Back Bun Damage Your Hair?
Let’s be direct: yes, it can — but only if you’re doing it wrong or too often. Board-certified hair restoration specialist Dr. Alan Bauman confirmed in a 2025 NBC Select investigation that repeatedly pulling hair tightly in the same direction places continuous tension on the hair shaft and follicle, which can progress to traction alopecia — a form of hair loss that begins as thinning at the temples and hairline.
The good news? Traction alopecia is reversible in its early stages if caught quickly.
Signs you need to back off the tight styles:
- Visible thinning along the front hairline or temples (the “fringe sign” trichologists look for)
- Scalp soreness or tenderness after removing the style
- Increased hair in the brush during styling
- Baby hairs that no longer grow back between styles
How to wear this style safely:
- Frequency cap: Board-certified trichologist Helen Reavey recommends keeping tight slicked styles to 2–3 times per week at most to minimize traction stress on the follicles
- Never sleep in it — overnight tension compounds damage faster than daytime wear
- Alternate with looser styles — a messy bun or a top knot with minimal tension gives the hairline recovery time
- Use silk or satin hair ties — these produce far less friction at the shaft than standard elastics
- Avoid styling wet hair — wet hair breaks more easily under tension and increases traction risk on already stressed follicles (American Academy of Dermatology)
Frequently Asked Questions
Board-certified trichologist Helen Reavey recommends limiting tight slicked-back styles to 2–3 times per week maximum. Daily wear significantly increases the risk of traction alopecia, particularly along the temples and front hairline. If you must style your hair daily, alternate with loose styles or a protective half up half down style that keeps hair partially secured without tight pulling.
The most common culprits are: using an elastic that’s too loose, starting with overly slippery product (like pure oil), or skipping the wrap-and-pin step. Switch to a bungee hair tie with hooks, use a medium-hold gel (not oil alone) to build grip, and anchor the bun with at least 4–6 bobby pins placed in opposing directions — this cross-pin technique holds far better than parallel pinning.
Yes, with a modified approach. For shorter lengths that don’t reach a full bun, create a small “faux bun” by tucking a low ponytail under itself and securing with pins, or use a small hair donut form to build volume. Medium-length hair (collarbone to shoulder) works best with a low placement where even shorter strands can reach the elastic cleanly.
Often, yes. Second-day hair has natural oils that act as a built-in primer, reducing the amount of product needed to achieve slip and hold. The scalp’s sebum essentially pre-coats the strands, making them easier to smooth without the stiffness that can come from heavy first-day gel application. That said, a light dry shampoo at the roots beforehand prevents the look from appearing greasy rather than intentionally sleek.
They’re closely related, but not identical. A ballerina bun sits high on the crown, is traditionally ultra-tight and compact, and is associated with dance performance. A slicked back bun can sit anywhere from the nape to the crown and typically allows for more variation in finish and looseness. Both use the same slick-back technique at the roots — the positioning and occasion-context are what differentiate them.
Key Takeaways
The slicked back bun earns its staying power because it genuinely delivers: it’s polished, practical, and surprisingly flattering once you match the bun position to your face shape. Keep these principles in mind:
- Position determines flattery — low for square and round faces, high for oval and heart-shaped faces
- Finish determines occasion — glossy for evening, matte or natural shine for daily wear
- The two-step hairline method (secure body first, smooth edges after) protects your hairline without sacrificing the snatched effect
- Frequency matters — limit tight styles to 2–3 times weekly to keep traction alopecia at bay
- Silk accessories and dry starting hair are the two easiest upgrades most people skip
Master the mechanics once and this becomes your fastest, most reliable style — whether you’re dressing it up for an event or pulling it together in the car.
