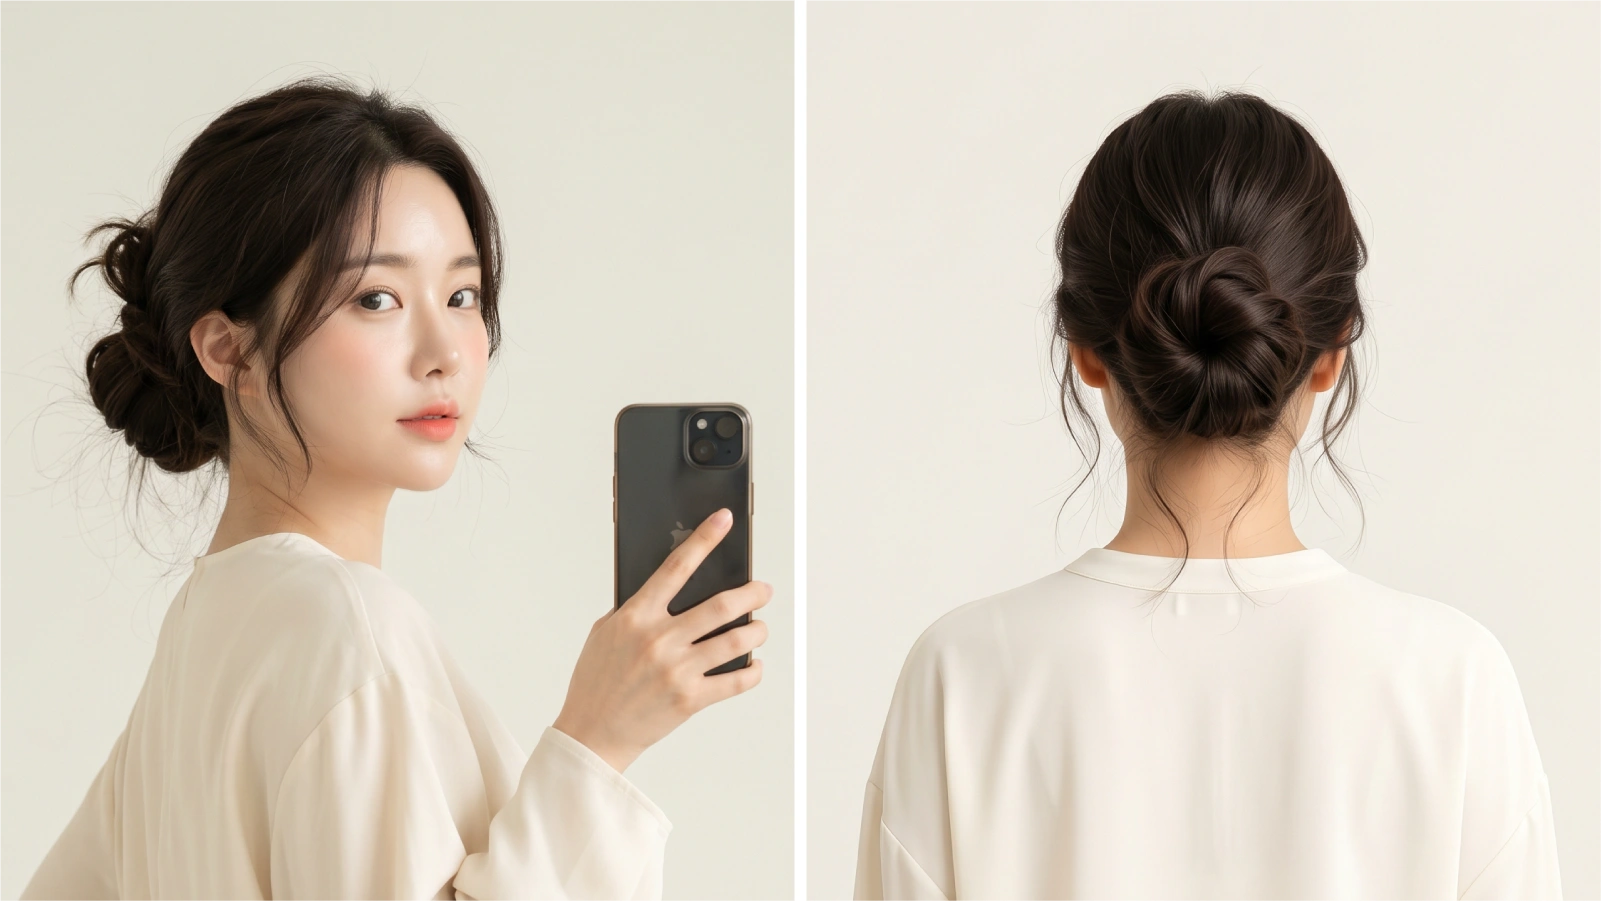
The messy bun is the most requested hairstyle on Pinterest, TikTok, and Google — and for good reason. It works on dirty hair, takes under three minutes, and pulls off “effortlessly chic” without a single hot tool.
But here’s what most tutorials skip: the result depends entirely on where you place it, how you build the base, and which version suits your face.
This guide covers all of it — from a simple step-by-step method for beginners to face-shape-specific placement, hair-type modifications, and occasion-ready styling cues.
If you’re exploring quick hairstyles for women that don’t require heat or a lot of time, the messy bun is the one style worth mastering first.
Style Snapshot
How Do You Do a Classic Messy Bun Step by Step?
The classic version suits most hair types and works best on second-day hair — the natural texture gives it grip and shape without extra product.
A perfectly imperfect messy bun is the result of deliberate looseness, not actual carelessness — the difference is everything.
What you’ll need:
- 1–2 hair elastics
- 5–8 bobby pins
- Texturizing spray or dry shampoo (optional, but helpful on freshly washed hair)
- Light-hold hairspray for finishing
Step-by-step method:
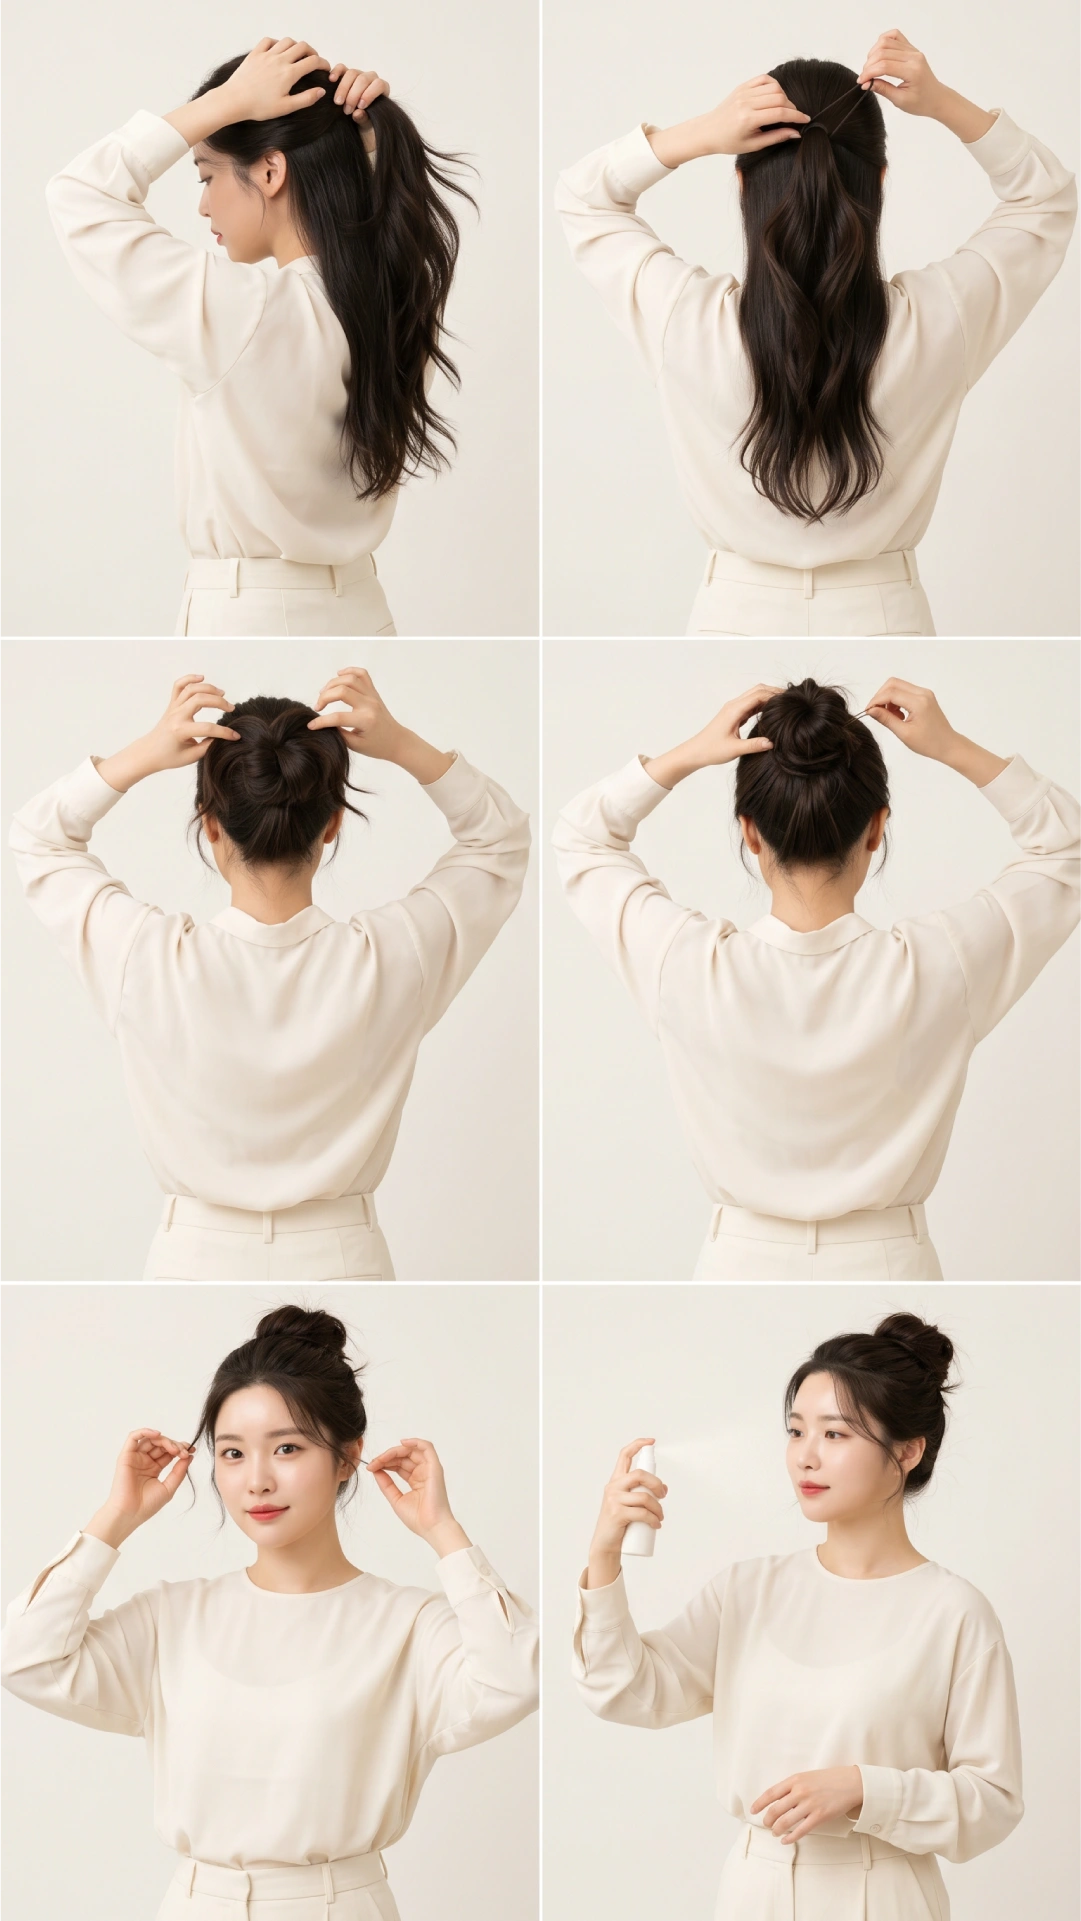
- Flip your head forward and gather all hair at the crown (or wherever your target placement is — more on that below). Using your fingers rather than a brush keeps natural texture intact and adds grip.
- Secure a loose ponytail with one elastic. Don’t pull it all the way through on the final wrap — leave a looped half-bun shape with the ends sticking out. This is your bun base.
- Fan the loop outward with your fingers to build width. For a fuller bun, gently tug sections upward and outward before pinning.
- Wrap the tail around the base in any direction, tucking loose ends under. Use bobby pins in an X-shape to secure — this grip method holds far better than straight pins.
- Pull 2–4 face-framing strands loose from the front and sides. These aren’t an afterthought — they soften the look and frame your face intentionally.
- Finish with a light hairspray mist from 10–12 inches away. Don’t saturate; you want movement, not stiffness.
Which Messy Bun Placement Suits Your Face Shape?
Bun placement is the most overlooked variable in most tutorials — and it changes your look more than any product or technique.
Choosing the right bun height for your face shape does more for your overall look than any product or technique.
For round faces, pairing a high messy bun with classic space buns as a playful alternative can achieve the same lengthening effect on casual days.
What’s the Best Messy Bun for Your Hair Type?
One method doesn’t work for all textures. Here’s what actually changes by hair type:
Fine or thin hair:
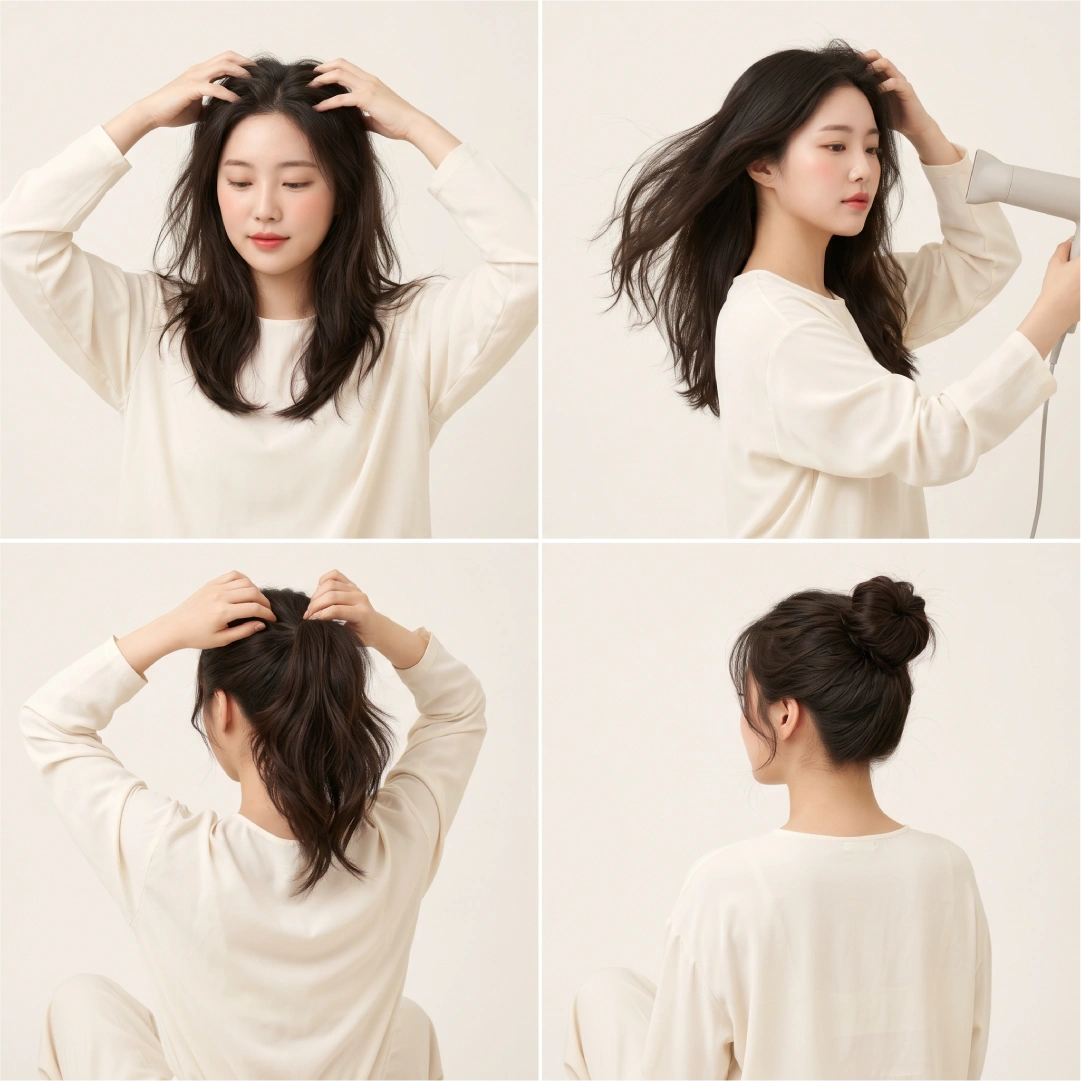
- Work with second-day hair or add a texturizing powder at the roots before styling
- Use a volumizing mousse before blow-drying, then style immediately while hair still has body
- Tease the ponytail lightly before wrapping to fake fullness
- A donut bun insert (a foam ring slipped over the ponytail) creates the illusion of a fuller bun in under 60 seconds
Thick or coarse hair:
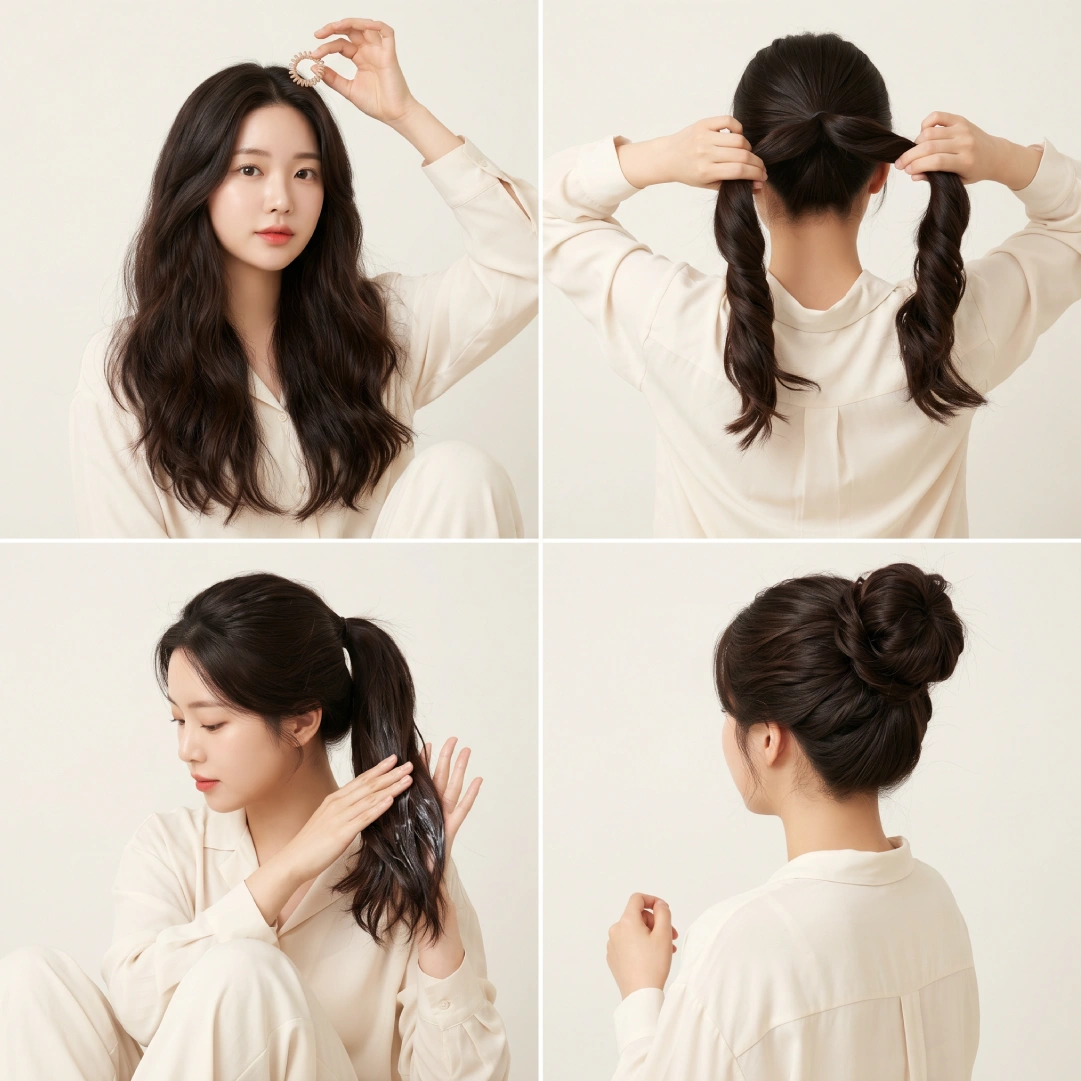
- Use a coiled plastic hair tie — standard elastics break or sag under volume
- Split the ponytail into two sections and twist each before wrapping; this distributes bulk more evenly
- Apply a light cream or oil at the ends before securing to prevent flyaways without stiffness
Curly or coily hair (Types 3–4):
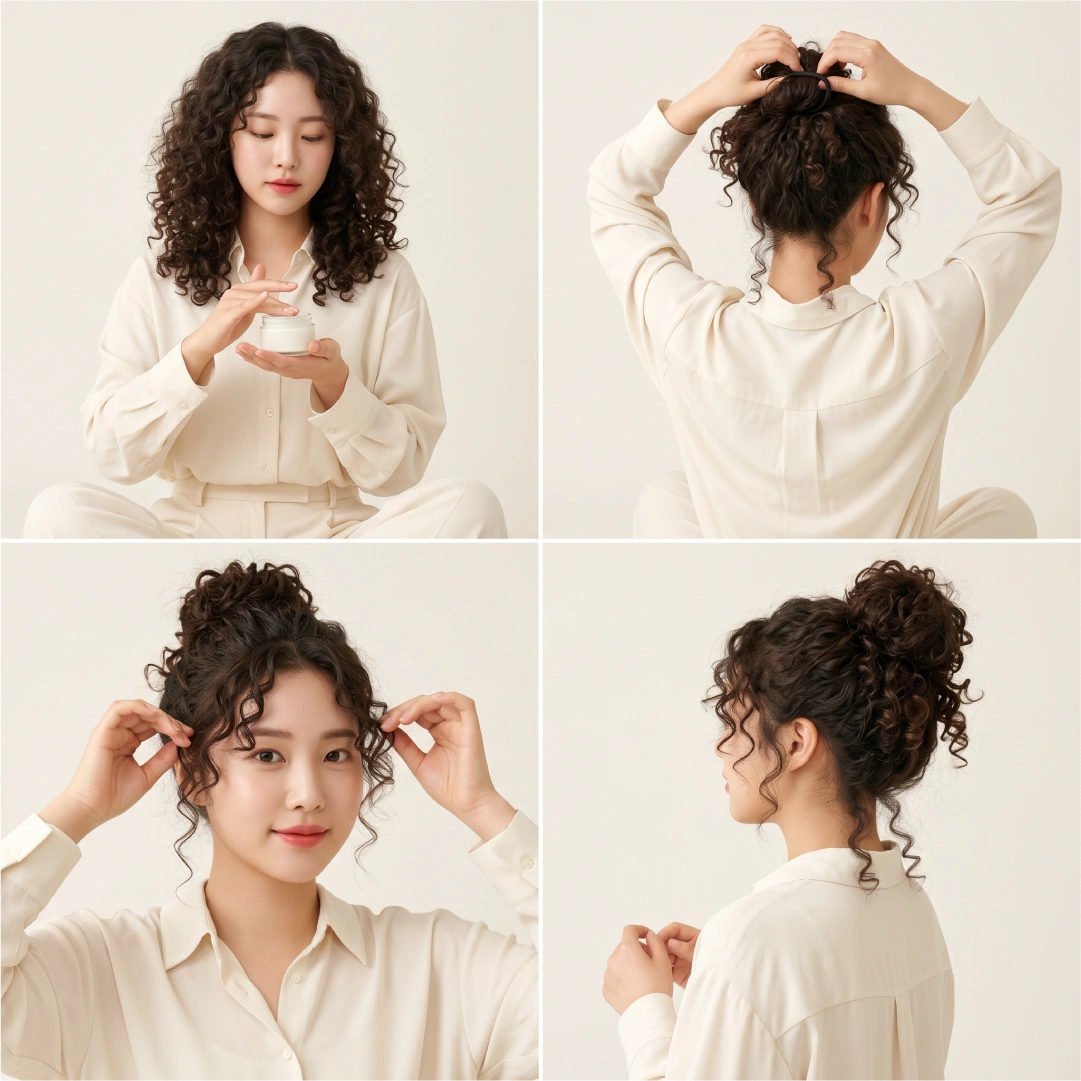
- Start with a leave-in conditioner to define your curl pattern, then let hair air dry before styling
- Skip the twist-and-wrap method — instead, loop your hair through the elastic once and let the curl cluster naturally into a bun shape
- Pull individual curl clumps forward to frame the face, rather than pulling out straight side tendrils
Wavy hair:
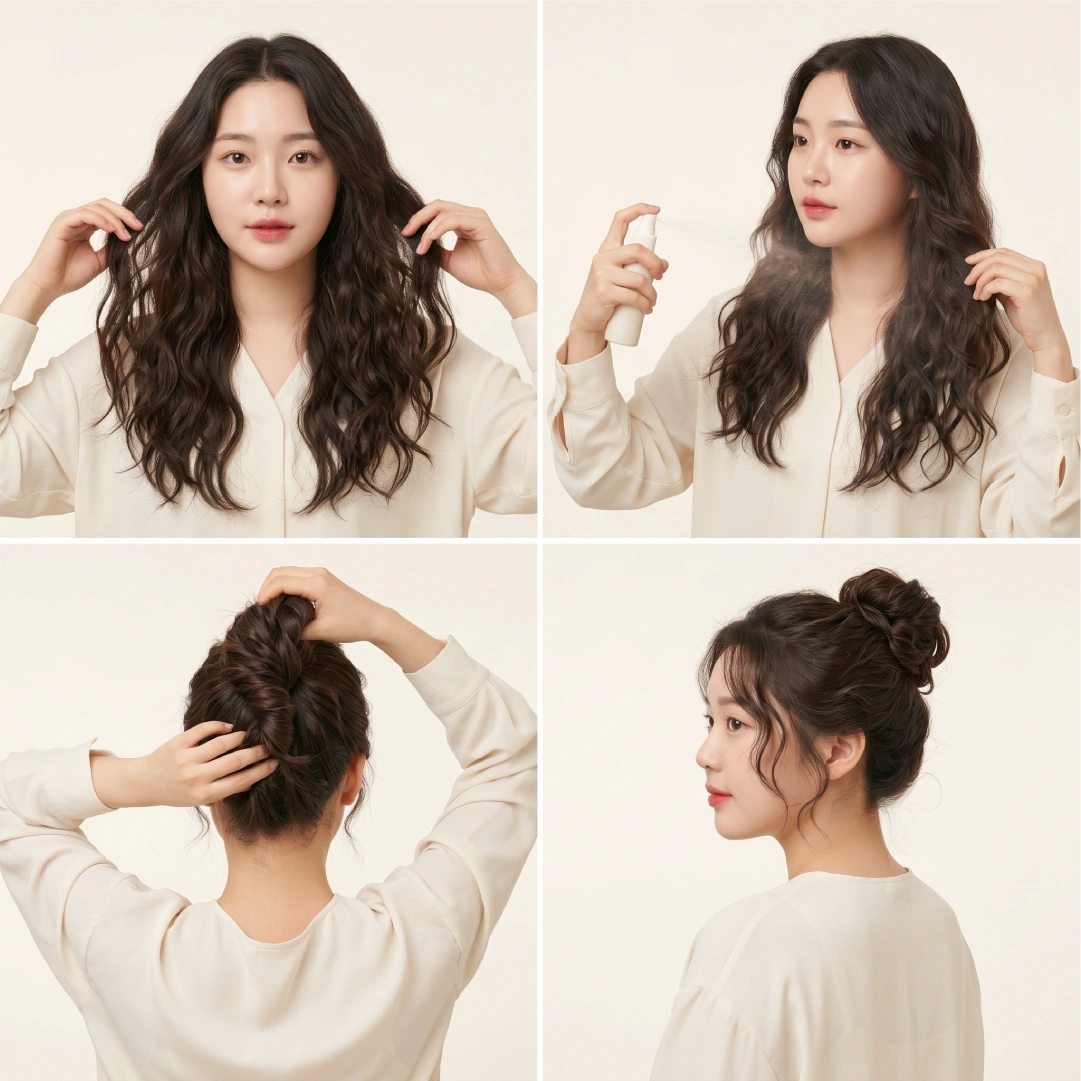
- Wavy hair is the easiest texture for a messy bun — the natural wave creates built-in body
- Enhance texture before styling with a sea salt spray
- A twisted bun variation works especially well here, letting the wave pattern show through the twist
How Do You Style a Messy Bun for Different Occasions?
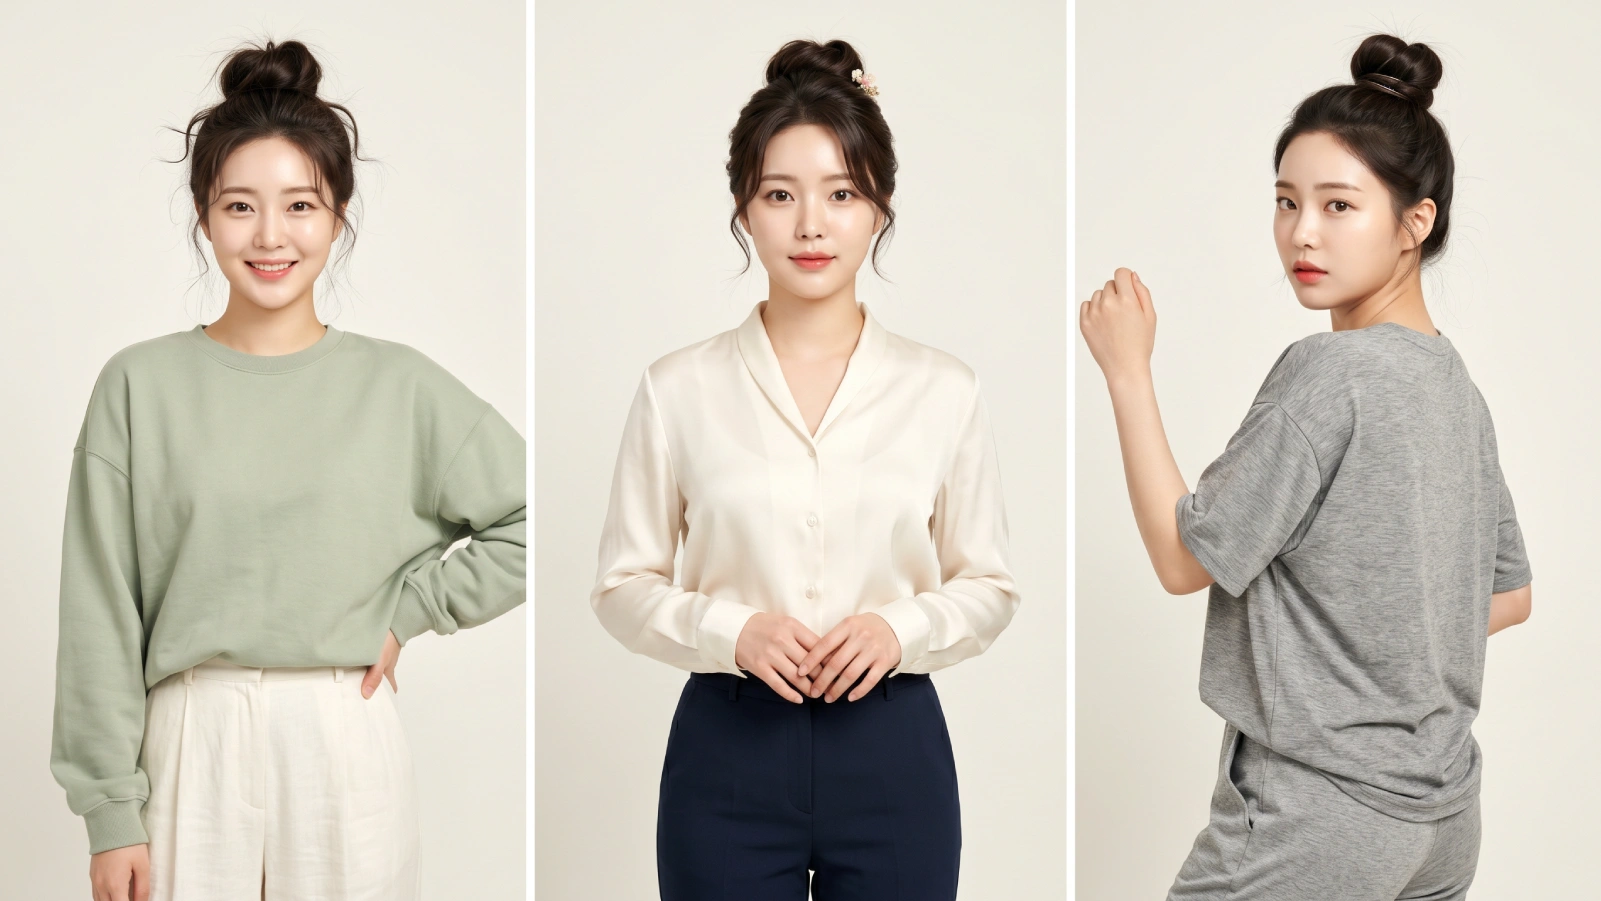
The same base bun gets dressed up or down through three variables: tightness, accessories, and flyaway control. Here’s how that breaks down by setting:
On days when the office calls for something more structured, a slicked-back bun follows the exact same base structure — just swap the loose strands for smoothed edges and a stronger hold product.
Why Does My Messy Bun Fall Out — and How Do I Fix It?
This is one of the most searched questions about the style, and most tutorials never answer it properly. Bun collapse almost always comes down to one of four fixable causes:
- Too-clean hair: Fresh-washed hair is slippery. Dry shampoo or texturizing spray adds the friction your style needs to grip.
- Elastic too tight or too loose: A tight initial ponytail creates a rigid base that shifts. A very loose one has no anchor. Aim for firm but not scalp-pulling tension.
- Wrong bobby pin technique: Straight pins slide out. Insert bobby pins in an X-cross pattern — two pins at opposing angles grip the elastic and the bun simultaneously.
- Skipping the wrap-around step: The ends of your hair need to be tucked and wrapped around the base, not just folded in. Untucked ends have nothing to anchor them.
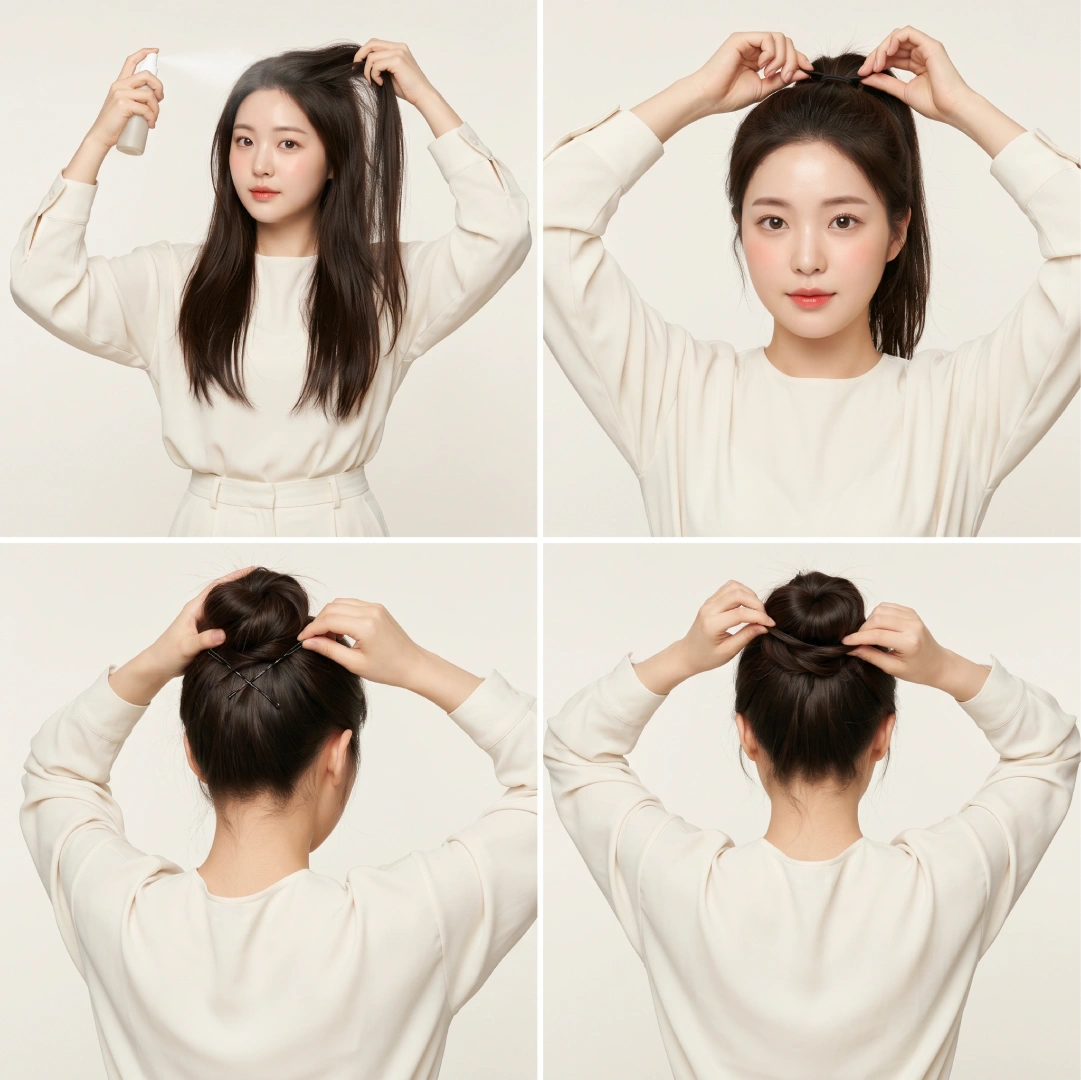
A quick fix if your bun droops mid-day: don’t remove it entirely. Instead, slide one or two extra bobby pins across the base in an X-shape and give it one brief hairspray mist. It’ll hold for several more hours.
Note: Wearing tight buns daily — especially at the same position — can cause traction alopecia, a form of gradual hair loss from repeated tension at the roots. Rotating bun placement and opting for silk scrunchies over tight elastics significantly reduces this risk.
Rotating your placement between a high crown position and a low bun at the nape also helps distribute tension more evenly across your scalp over time.
Frequently Asked Questions
You can create a messy bun with hair as short as chin length. The technique changes: use two or three clips to gather sections rather than one ponytail, and let shorter layers frame your face naturally. Bobby pins do more structural work than an elastic at this length.
A top knot sits directly at the crown and is generally tighter, more structured, and sits vertically. A messy bun can sit anywhere from crown to nape, is intentionally loose, and has deliberately pulled-out strands. The top knot leans sleek; the messy bun leans relaxed.
Worn daily in the same spot with a tight elastic, yes — breakage and traction alopecia are real risks over time. The note above this section covers exactly how to reduce that risk.
The key is texture before styling — dry shampoo or texturizing spray at the roots solves this completely. A donut insert handles the volume side.
- Claw clips: Best for a quick, casual look — skip the elastic entirely and just clip the gathered hair
- Silk or velvet scrunchies: Add visual interest without the crease damage of traditional elastics
- Bobby pins in metallic or pearl finishes: Work as both structure and decoration simultaneously
- Thin scarves or ribbons: Tie around the base of the bun for a polished, intentional look at formal events
Two things separate a chic messy bun from hair that just looks unkempt: face-framing tendrils and bun shape. Pull out specific strands near your temples and cheekbones — not random sections. Then shape the bun by pressing it slightly flat with your palms; round, wide buns read as intentional while lumpy, asymmetric ones don’t.
Key Takeaways
- Bun placement matters more than technique — match height to your face shape first, then follow a method
- Second-day hair outperforms freshly washed hair for grip, volume, and longevity
- Bobby pins in X-cross formation hold dramatically better than straight pins
- Three variables control occasion-readiness: tightness, accessories, and flyaway control
- Daily tight buns risk traction alopecia — rotate placement and use softer elastics to protect your hair long-term